▲ Bourse minéraux et fossiles de Sainte Marie aux Mines (Alsace) - 24>28 juin 2026 ▲ |


Harjo
-
Compteur de contenus
443 -
Inscription
-
Dernière visite
Type de contenu
Profils
Forums
Galerie
Blogs
Boutique
Tout ce qui a été posté par Harjo
-
vos plus gros cristaux
Harjo a répondu à un sujet de Laurent Saint-Clair dans Forum Minéraux et Minéralogie
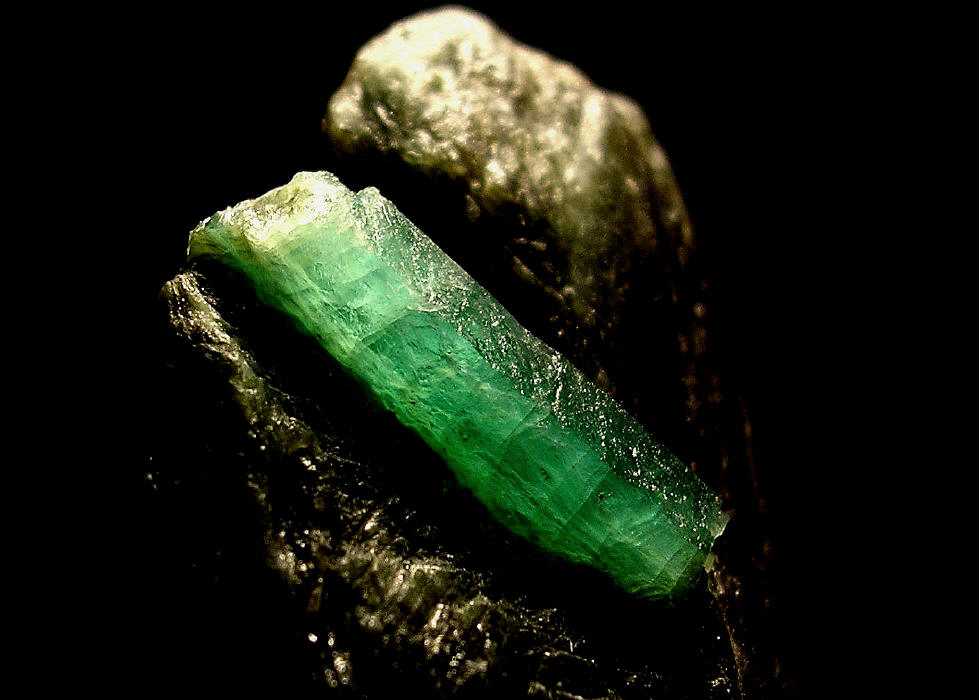
un petite explication.....3 cm pour un bonne Emeraude de Habachtal est un monstre..... -
vos plus gros cristaux
Harjo a répondu à un sujet de Laurent Saint-Clair dans Forum Minéraux et Minéralogie
Beryl (var Emeraude), presque 3 cm. (trouvez par moi en juillet 2004) Leckbachrinne, Habachtal, Hohe Tauern, Salzburg, Autriche.
-
La microphotographie / cherche spécialistes
Harjo a répondu à un sujet de serguen91 dans Forum Microminéraux
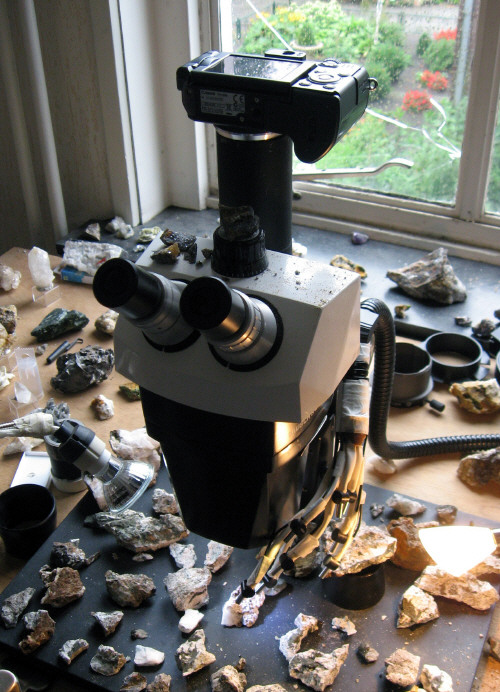
Ici c'est un trino Bausch&Lomb StereoZoom7 avec un Canon A640 (10 Mp) sur la phototube.
-
La microphotographie / cherche spécialistes
Harjo a répondu à un sujet de serguen91 dans Forum Microminéraux
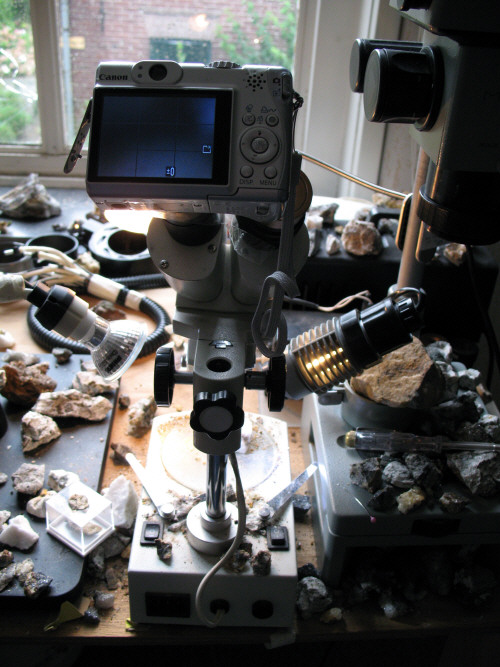
Mes deux "set-up" Ici c'est un Bino tres ordinaire (Byomic) avec un Canon A540 (6 Mp) sur l'oculaire.
-
La microphotographie / cherche spécialistes
Harjo a répondu à un sujet de serguen91 dans Forum Microminéraux
Hi, Pour la lumiere.... l'Ampoule ordinaire c'est AVEC filtre blue. Pour regler le balance des blancs, hm, c'est toujour un peu au milieu. En fait, il y a des faces d'une cristal qui sont un peu trop bleu, ou trop jaune, pour un resultat agreable je faire un balance des couleurs apres, avec photoshop et photo-edit. Dans CombineZ (ou Helico-Focus) le nombre des plans dependant de l'objet, parfois seulement 4 et parfois plus de 30..... Je n'aime pas beaucoup les photos avec "in-focus" surtout le photo, de voudrai encore un peu de perspective "atmospherique", isolee un cristal par son peripherie. Un autre probleme est la distortion de la perspective, la perspective de la resultat est un peu comme avec un appareil de photo "technique". Et.....excusez moi pour ma francais..... Salut Harjo -
La microphotographie / cherche spécialistes
Harjo a répondu à un sujet de serguen91 dans Forum Microminéraux
Pour notre site de strahlen.org j'ai ecrit un petite guide pour la depart en micromineral photographie, c'est en Anglais, je m'excuse..... Salut Harjo ---------------------------------------------------------------------------------------------------------------------------------------------- Here are some tips for those of you that would like to venture out into the wonderfull world of mineral micro photography. Here's what you need: 1-a microscope, doesn't have to be an expensive one, either a binocular or a trinocular. 2-a digital camera with an optical zoom (very important, only digital zoom won't do!!), the same goes for this, it does not have to be an expensive one (it shouldn't be too heavy though), and in case you use the phototube of a trinocular you also need an adapter to fit the camera to the microscope. 3-a lightsource, the best option is a "cold light" (i.e. optical fibre) source, because in that case there is no excessive heat building up close to the specimen or your microscope (if you think such an installation would be too expensive it's also possible with ordinary spots, take care though with the heat!) 4-a software kit for editing photo's, these come usually with a new camera, for instance, with my Nikon came Photoshop and with my Canon cam- Photo-edit deluxe. This is what you do: 1-You place the specimen under the microscope and look for the crystal or area you would like to photograph. Look only through one occular, this wil be the ocular trough which you'll make the photograph when working with a binocular. When working with a trinocular it would be good to attach a notebook or a TV screen to the camera to be able to judge the right frame. Take great care in positioning the object at an easteticaly appealing angle (a crystal photo from a 90 degree angle on it's top is hardly ever appealing). Just tilt the object until you have a nice angle and turn it around until you capture it's most favourable side. Keep in mind, a low horizon (in this case the matrix on which the crystal rests) makes the crystal look far more impressive! Also take great care in the composition of the image, make sure that there is an equal balance between the crystals in the image, one corner shouldn't be heavier as the other ones, and if it is (if that's your decision) move the specimen around until you have a "counterweight" somewhere else in the image (you can edit the composition with your software, more on this later). Now make sure your specimen is properly lit. For me the most beautifull results are achieved when you have an overall moderate lightsource and a strong lightsource from one direction (left or right, whatever makes the crystal look the most brilliant. I usually take my pics in front of the window with daylight and boost this using a fibre light (cold light installation) from either the left or right side. If you're ready with this you can move on to the next step. 2-Take out your camera and place the objective on the ocular through which you were looking when you were positioning the specimen, when working with a trinocular the camera is already attached to the phototube. Then zoom in using the optical zoom until the rounded edges of the ocular or phototube dissapear, or further until you have the image you like (this will show on the little screen on the camera, important not to turn this off, this is where you should look from now on, looking directly through the camera won't work, or of course on the TV screen or notebook). Switch off the flash. Put the dial of your camera on the "manual" position and the macro position. If you use an extra lightsource besides daylight you should switch the white balance of the camera to "incandescent" light. If the backgroud of the image you've chosen is very light compared to the crystal make shure you switch the exposure (exp. +/-) a few stops up (+), if the crystal is very shiny you can counter this by putting it a few stops down (-) or take back on the lightstrength (not too dark though!). Now hold the camera in place on the ocular (this of course doesn’t apply to working with a trinocular scope) with your left hand and turn the adjusting/sharpening knob of your microscope with your right hand whilst looking on your camera screen, turn it until the image on the camera appears as sharp as it can get. Then hold your camera very still or make sure the camera is properly attached to the phototube and press the button to make your photo. Try this a couple of times until you get a satisfactory sharp image and then go on to experiment with your lighting, camera settings and positioning of the specimen. If you experiment a lot you'll quickly see your images improving dramatically, experience is the key here, as so often..... When you have a couple of shots on your camera you can go on to the next step. 3-Edit the photograph using the software provided with your camera. The manual will tell you what to do in order to be able to use the software the most effectively, ofcourse I can't go into that any further here because there's so much different programmature around, I can say though that I'm very happy with Adobe photoshop augmented with Photo-edit. Now on to the final step. If you don't have any editing software you can skip this step and go on to the next step. 4-Save the pics on your computer (I allways choose the jpeg format because its acceptance is so widespread) in your documents and if you like print them on photopaper. If this is all consumed well and everything works fine you can go on to making multilayer images and stack these using the software from Helicon or CombineZ (free!!), you'll be surprised what you can do with that, but that's for later, first get to know the basics well. I'll post something on stacking here on a later date. A link to stacking: www.strahlen.org/forum/viewtopic.php?t=56 Well, that's about it. I hope I've been able to show to you that you don't need a lot of fancy expensive equipment in order to make basic mineral photograph through the microscope. Some small aditions.... About lighting: I found out that the best results are achieved when using different lightsources. My latest photographs are made using up to 5 different lightsources in one pic: (northern) daylight from the window, coldlight reflected on white paper (if one uses coldlight directly on the specimen one gets very annoying and ugly reflections on the crystal faces), a Halogen light, a led light (also reflected, for the same reasons as coldlight) and an ordinary bulb withn blue filter. Like this you can experiment a lot, it gives you a lot of tools to be able to highlight all aspects of a crystal's faces. Also a light with a lens in front of it gives very nice results, that way you can minimize the area being lit so you can realy make the main object stand out from its background. I also would like to stress the importance of composition, a sharp pic alone won't do. Try to look for diagonals in the area you want to capture, nice diagonals can result in a very dynamic and exciting picture (they can be diagonals caused by the placement of crystals, of "claire-obscure" (=light-dark), of colour etc. Allways make your composition well balanced, object opposed to background/perifery, light opposed to dark, counterweight "heavy" colours (red, orange, yellow), perspective etc. One more addition on the use of stacking software: When using stacking software be sure to allways take a shot of the nearest point of the specimen you want to have in focus first, then work down to the furthest point you want in focus, and upload it to the stacking sequence the same way. Don't allways go for the completely sharp pic as you will loose all atmospherical perspective and the result will be a very flat pic. Also be aware that the true perspective will allways get distorted when stacking, a perfect cube will appear as though the front of the crystal is narrower then the end taken proper perspective into account, much in the same way as with a technical camera. Take care not to move the object, the algorythms in for example CombineZ and Helicon are quite powerfull but they can't cope with too much difference between consecutive shots, resulting in a lot of noise. Take control of too harsh reflections as most stacking tools can't cope with them resulting in annoying "halos". Make also sure you use small increments between shots, especially when using high magnification, there's a logic to that: the higher the magnification the lesser your depth of field will be so the smaller increments should be taken between the shots, this goes v.v., the lower the magnification the deeper depth of field so the steps can be bigger. Now to what camera to use.....SLR (digital mirror-reflex cameras) will give the best result BUT in stacking it is very good to be able to see real time what you are doing, taken that into account there are a number of very good options for compact cameras, I'm very fond of the Canon G7 and A640 also these two support remote capture so you can shoot from the notebook. Finally a short line on what gear I use: For the basic method I use a Canon A540 combined with a cheap standard Byomic scope (with very good natural light coming through), this still works the best for moderate magnifications. For higher magnifications I use a Canon A640 combined with a Bausch&Lomb StereoZoom7 with phototube. Well, that's about it, hope to have been of some help! Cheers Harjo ---------------------------------------------------------------------------------------------------------------------------------------------- -
mais.....l'Allemand est plus facile comme le Francais......
-
Il y a aussi quelques photos de soussignee.....(Foisches et Belgiques) C'est un tres grand travaille de Peter Seroka!
-
Merci! Ici un jolie Erythrite-Annabergite en deux generations. Rohdenhaus Allemagne Juillet 2007, fov 0,8 cm. (des autres chose a www.strahlen.org)
-
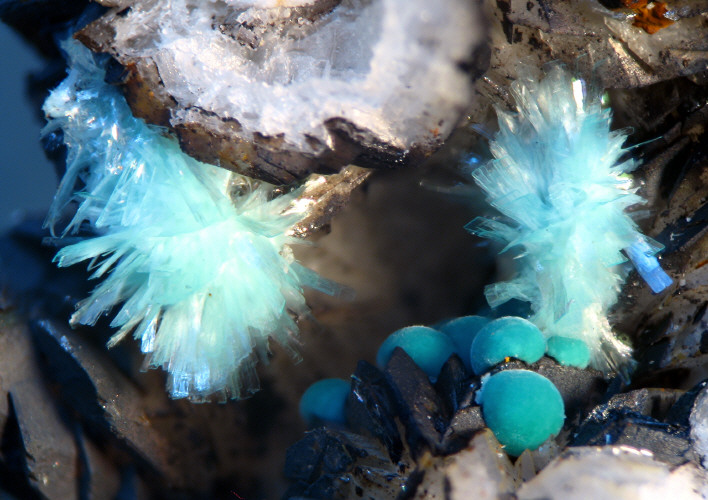
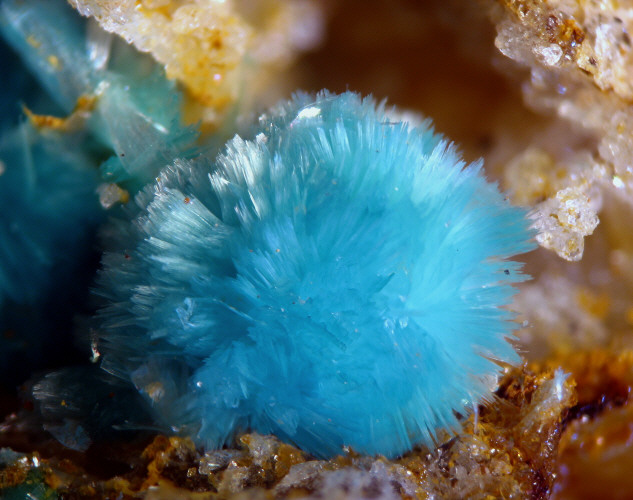
Aurichalcite avec Rosasite de Rohdenhaus, fov 1 cm.
-
Un jolie Aurichalcite de Rohdenhaus Allemange trouvez aujourd'hui.
-
Les minéraux du Titane : Anatase, Rutile, Brookite, Neptunite, Benitoite,...
Harjo a répondu à un sujet de Tourberyl dans Forum Minéraux et Minéralogie
Rutile de Bertrix, Belgique, fov 0,8 cm.
-
Les tailles: l'epidote est 0,8 cm, l'Apatite est 0,5 cm. Pour mes photos j'utilisez pour les plus petites un trino Bausch&Lomb ST7 avec un Canon A640 sur le phototubus, pour les moin petite j'utilisez un bino tres ordinaire de 20x avec un Cannon A540 sur l'occulaire. Pour les petites j'utilisez CombineZ et parfois Helicon Focus.
-
Les minéraux du Titane : Anatase, Rutile, Brookite, Neptunite, Benitoite,...
Harjo a répondu à un sujet de Tourberyl dans Forum Minéraux et Minéralogie
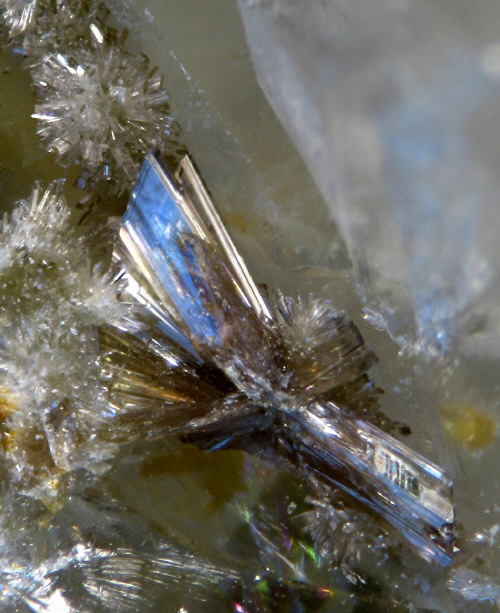
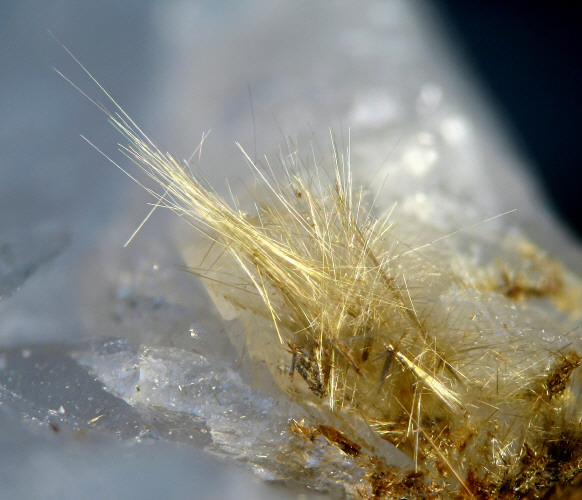
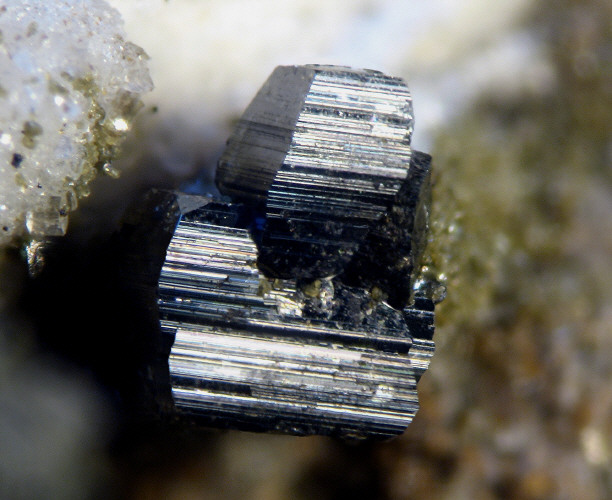
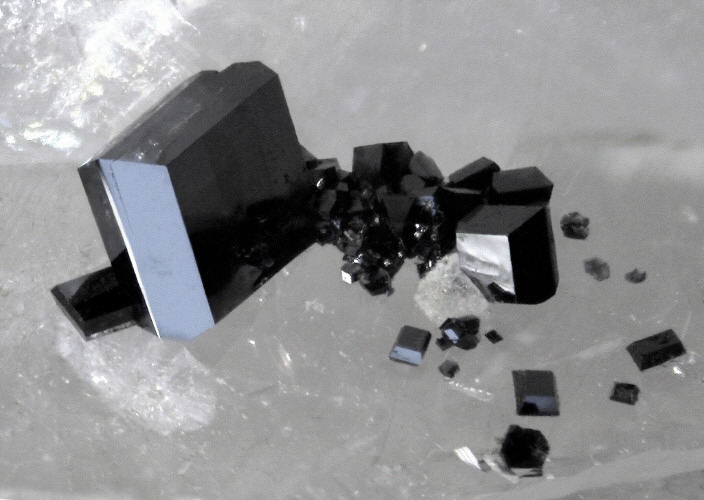
Brookite et Sagenite (partiellement pseudomorph apres Brookite!) 1 cm.
-
Les minéraux du Titane : Anatase, Rutile, Brookite, Neptunite, Benitoite,...
Harjo a répondu à un sujet de Tourberyl dans Forum Minéraux et Minéralogie
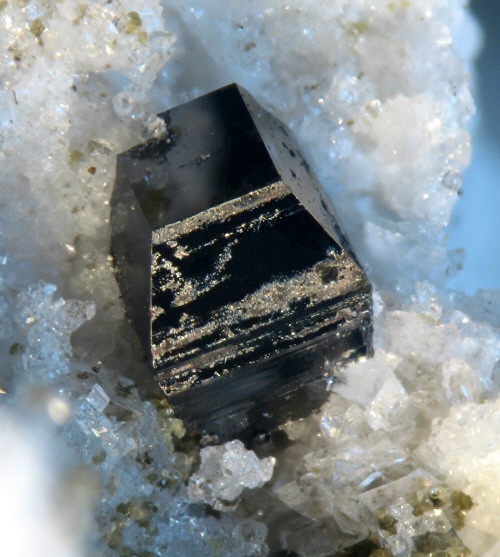
Anatase 0,5 cm.
-
Les minéraux du Titane : Anatase, Rutile, Brookite, Neptunite, Benitoite,...
Harjo a répondu à un sujet de Tourberyl dans Forum Minéraux et Minéralogie
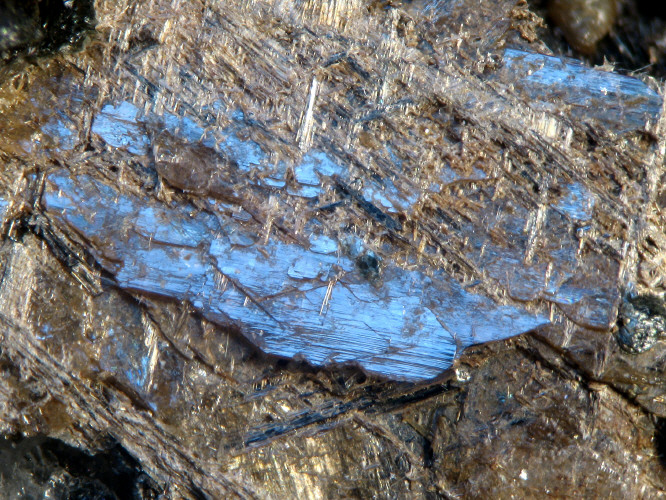
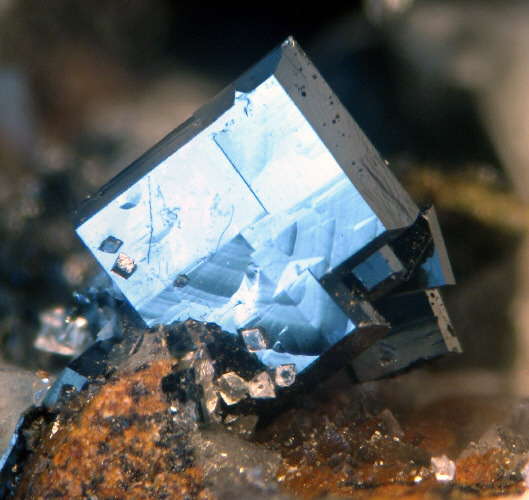
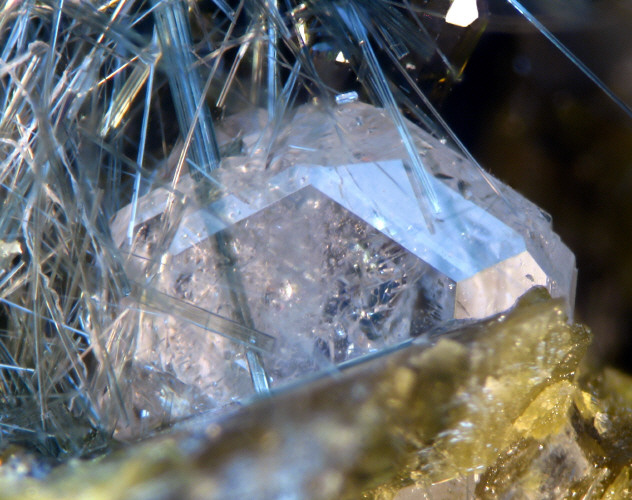
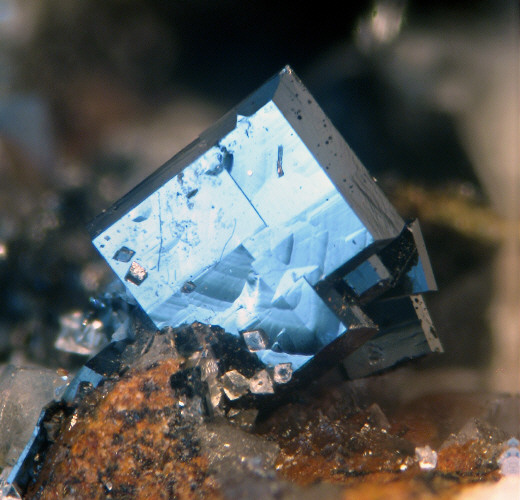
Quelques Anatase bleu sur Quartz.
-
Les minéraux du Titane : Anatase, Rutile, Brookite, Neptunite, Benitoite,...
Harjo a répondu à un sujet de Tourberyl dans Forum Minéraux et Minéralogie
Un jolie Anatase tabulaire de 0,4 cm.
-
Les minéraux du Titane : Anatase, Rutile, Brookite, Neptunite, Benitoite,...
Harjo a répondu à un sujet de Tourberyl dans Forum Minéraux et Minéralogie
Mes nouveaux trouvailles de Habachtal (juillet 2007). Anatase de 0,4 cm.
-
l'anatase est elle detruite par l'HCL
Harjo a répondu à un sujet de fredo dans Forum Minéraux et Minéralogie
Non -
Apatite et Epidote de Knappenwand, Autriche, trouvez juillet 2007.
-
Les minéraux du Titane : Anatase, Rutile, Brookite, Neptunite, Benitoite,...
Harjo a répondu à un sujet de Tourberyl dans Forum Minéraux et Minéralogie
Anatase de 0,4 cm, Habachtal Autriche, trouve le 7 juillet.
-
Anatase de Habachtal Autriche, fov 0,8cm.
-
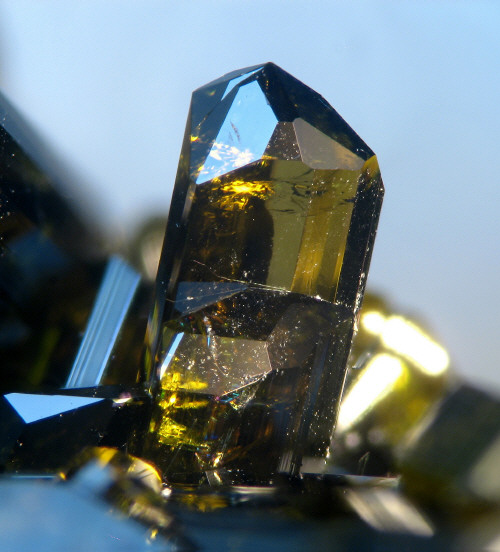
Epidote de Knappenwand Autriche, fov 1cm.
-
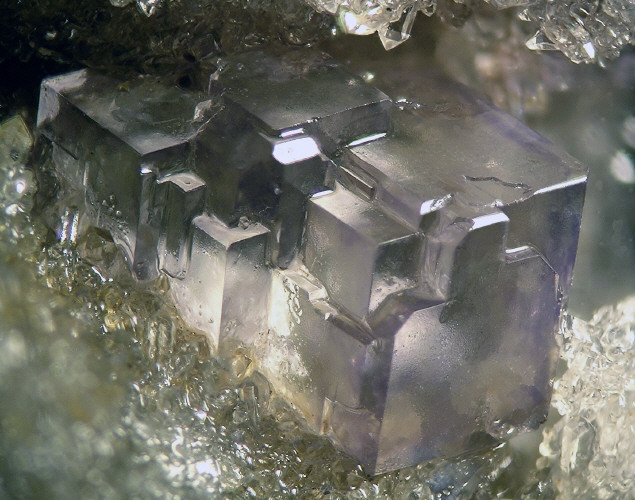
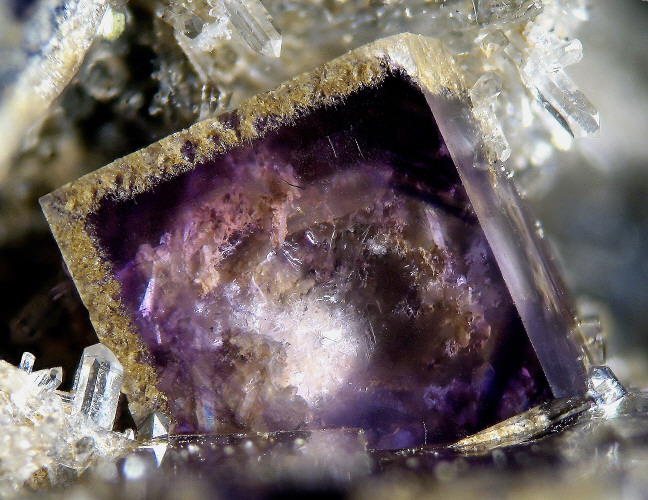
Fluorine de foische, fov 1cm.
-
Fluorine de Foisches, fov 1cm.